Edit Your Design
Advanced AI Editing
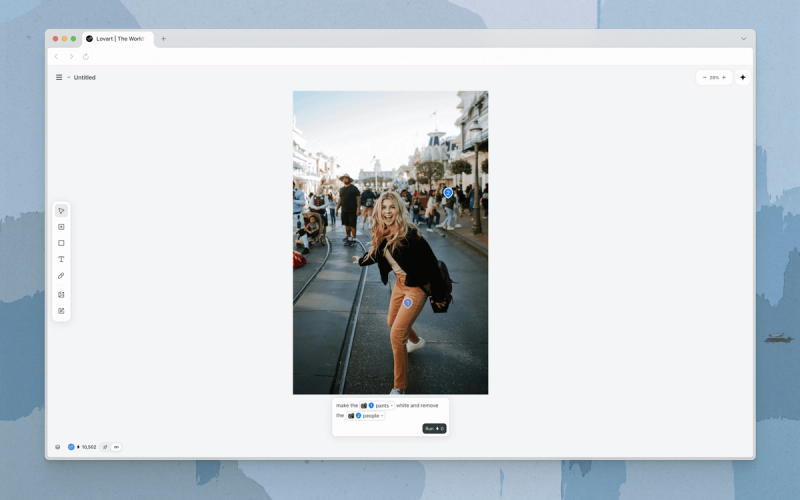
Quick Edit
Shortcut: Tab
Fast AI adjustments on a selected image.
What It Does
Quick Edit provides fast access to common editing tasks. Pick a frequently used adjustment from the panel, or prompt for a custom edit.
How to Use
- Access Quick Edit.
- Select an image on the Canvas.
- Click Quick Edit in the image toolbar, or press
Tab.
- Make adjustments.
- Click Swap to see more adjustment presets.
- Select an adjustment, or write a prompt.
- Generate.
- Click Run.
Quick Tips
- Quick Edit is handy for A/B testing. Compare side by side on the Canvas.
- Combine Touch Edit with Quick Edit to fine-tune the image with more precision.
Related Features
- Select: Select an element first, then press Tab for Quick Edit.
- Mark / Touch Edit: Click a specific spot in an image, then open Quick Edit to refine just that region.
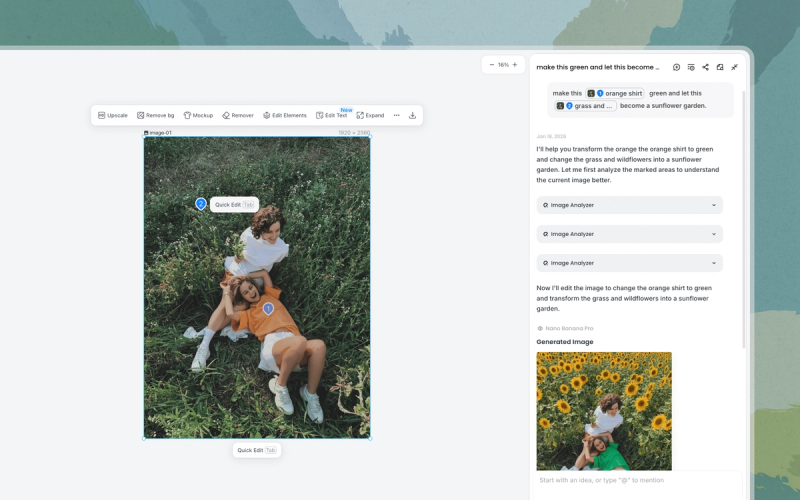
Mark / Touch Edit
Shortcut: M or Cmd/Ctrl+Click
Click anywhere on an image and Lovart identifies the exact objects you want to edit.
What It Does
Touch Edit lets you mark an element in an image and describe a precise edit in natural language. Lovart identifies the element and applies the edit.
How to Use
- Activate Mark Mode.
- Click Mark in the toolbar, press
M, or hold downCmd/Ctrland click the element you want to edit. - Lovart automatically recognizes and labels the marked object. The mark appears in the input box.
- Click Mark in the toolbar, press
- Describe the change.
- Type your prompt in the input box, or press
Tabto use Quick Edit.
- Type your prompt in the input box, or press
Quick Tips
- Use multiple marks to batch-edit several elements in a single pass.
Limitations
- Mark Mode supports up to 10 marks per prompt.
Related Features
- Quick Edit: Rapid AI adjustments via Tab on a marked element.
- Edit Elements: Split images into editable layers for manual repositioning instead.
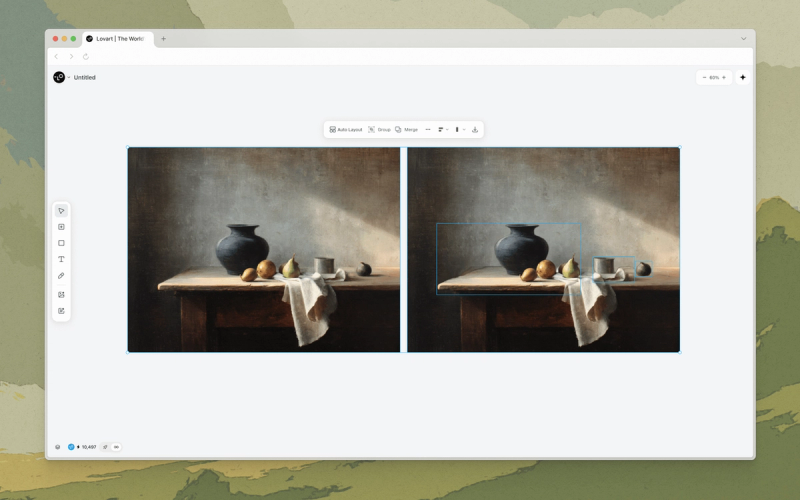
Edit Elements
Separate an image into layers with AI and edit each layer freely.
What It Does
Edit Elements breaks your image into individual layers, so you can reposition, resize, and adjust subjects, backgrounds, and text independently. Use it when you want to manually rearrange the composition.
How to Use
- Access the tool.
- Select the element on the Canvas you want to edit.
- Click Edit Elements in the top bar.
- Rearrange the elements.
- Your image is now separated into movable parts. Resize, rotate, or rearrange them as needed.
- Edit text elements.
- You can change the font, size, and content of text elements.
- Flatten and export.
- Once you're happy with the new composition, export multiple layers as PSD, or select multiple layers and flatten them before exporting as an image.
Quick Tips
- Edit Elements works best on images with clear subjects, text, and backgrounds.
Related Features
- Edit Text: Change the text content inside an image while preserving its style.
- Mark / Touch Edit: Edit specific elements without layer separation.
- Remove Background: Remove the background entirely instead of separating into layers.
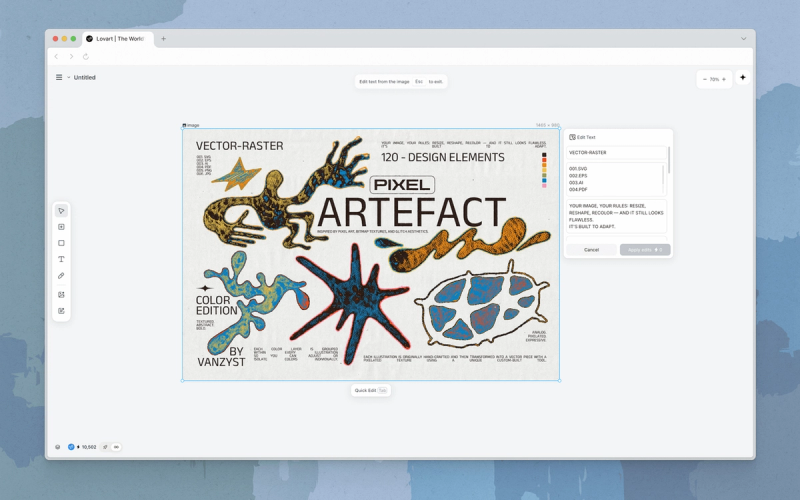
Edit Text
Change the text content inside an image while preserving its style.
What It Does
Edit Text lets you modify text within an image while preserving the original font and visual style. Use it when you only need to change the words, for example swapping a headline on an AI-generated poster or correcting a typo on a product label.
How to Use
- Access the tool.
- Select the element on the Canvas you want to edit.
- Click Edit Text in the top bar.
- Edit your text.
- The Edit Text panel opens on the right side.
- Type or paste your new text content.
- Apply or cancel.
- Click Run to generate, or Cancel to discard.
- Press
Escto exit text editing.
Quick Tips
- Review spelling and formatting before applying.
Related Features
- Edit Elements: Split an image into layers when you need to reposition text or change font and style, not just rewrite the text.
- Text: Add new text layers to the Canvas.